Project: Wall Calendar
This “Wall Calendar” is intended to show the current date and time, legible at both near and far distances, while hanging vertically on a wall.
In practice this consists of a Raspberry Pi driving a 4K 16x9 monitor.
Here it is in the wild.
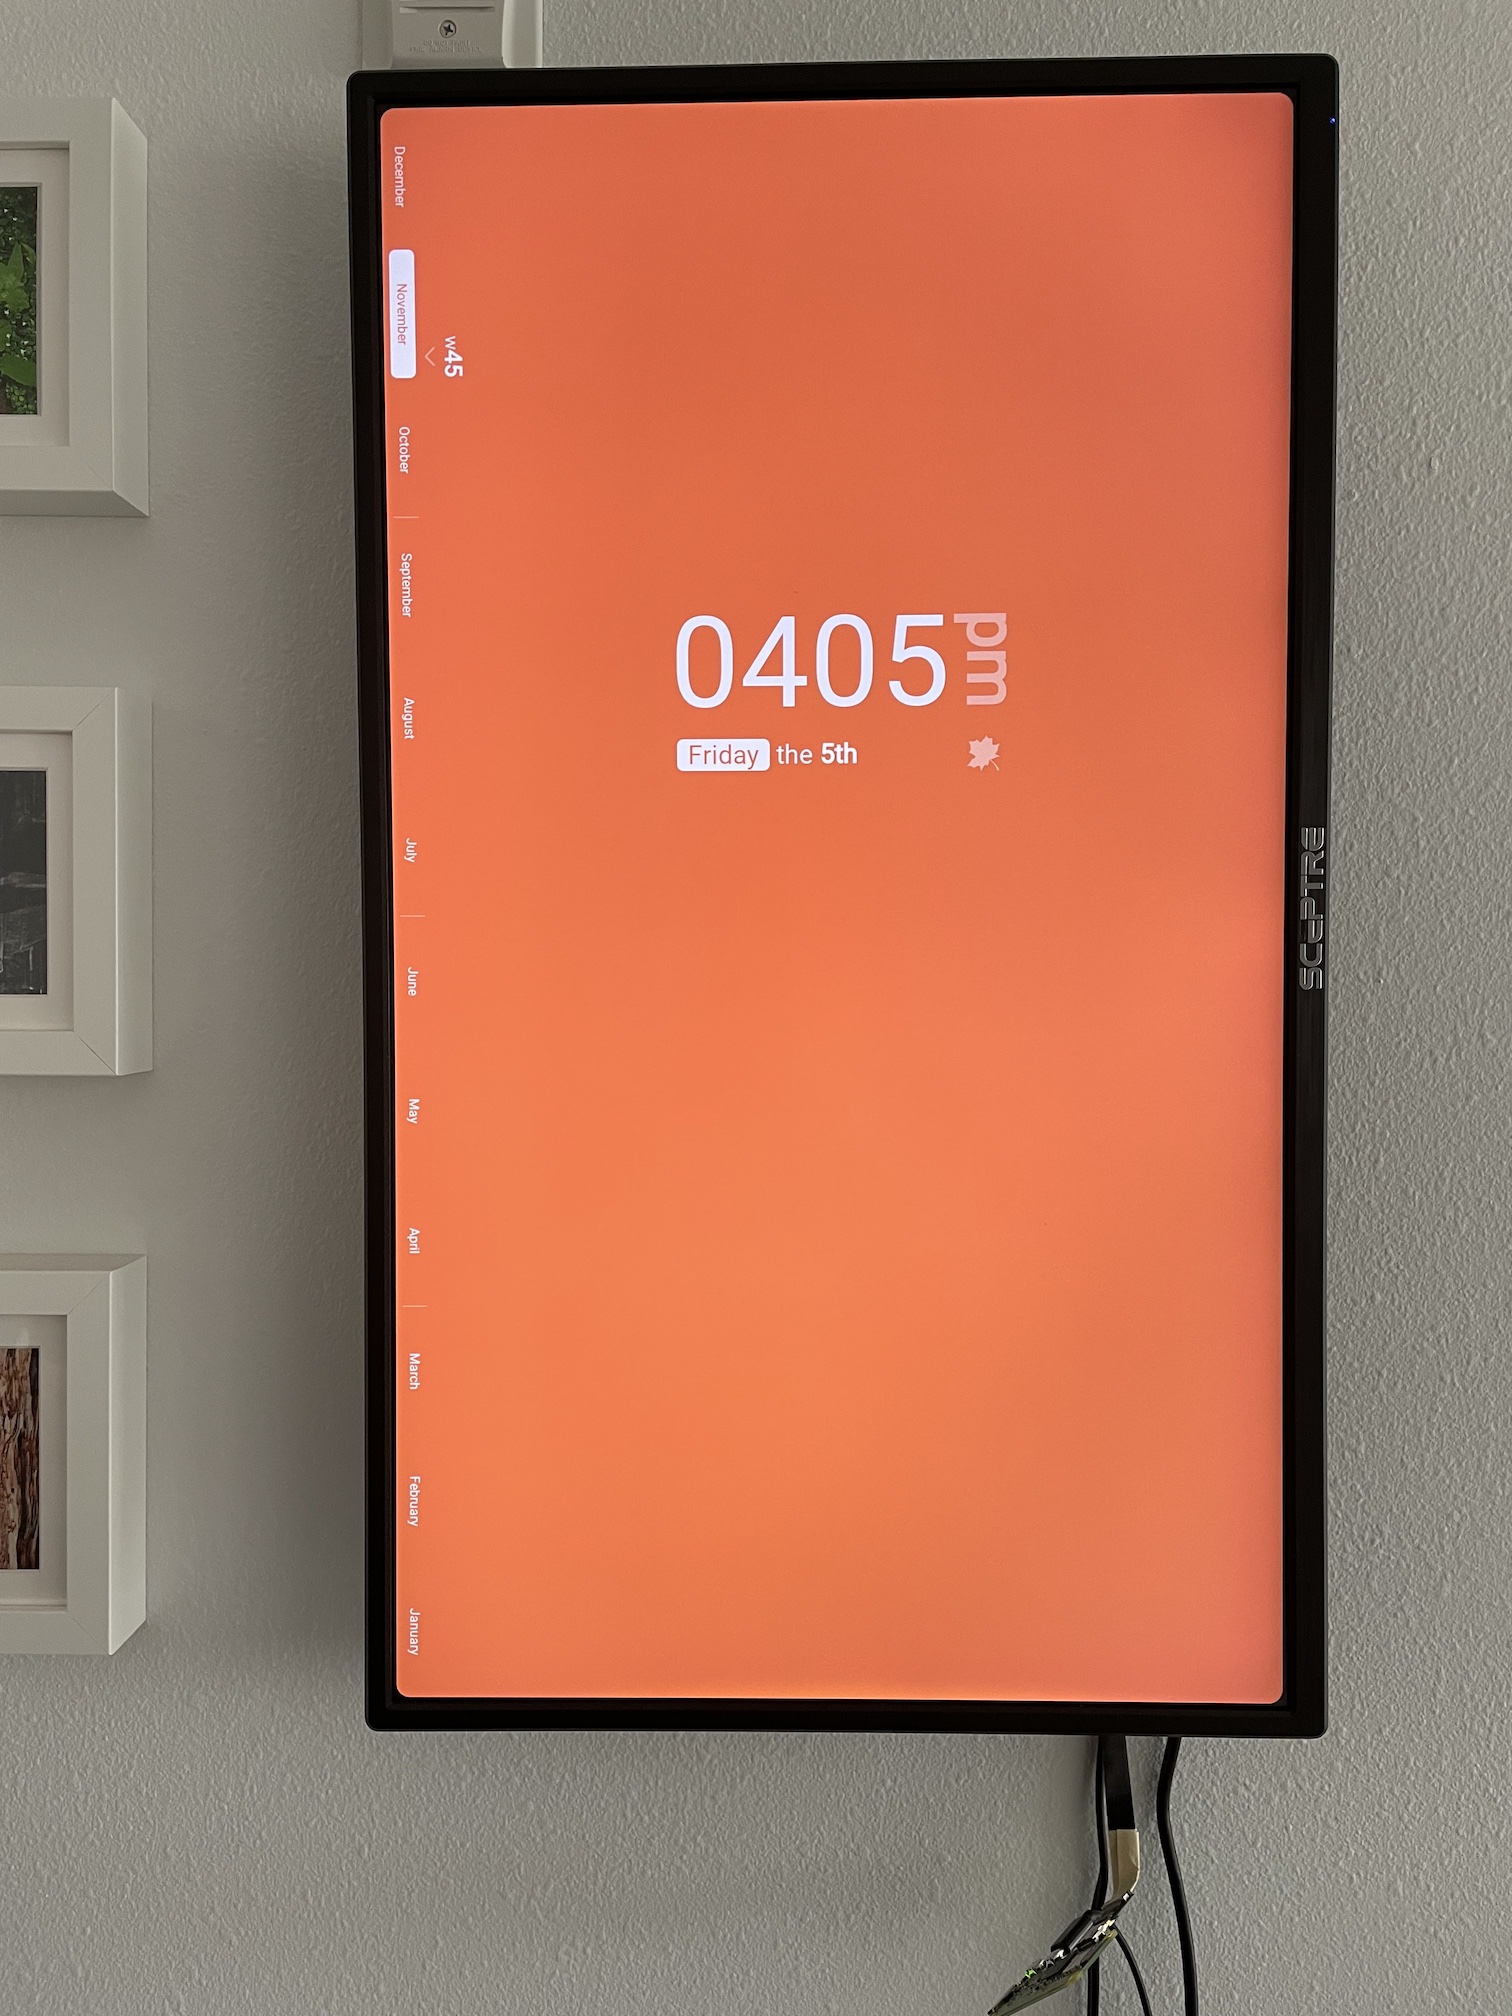 (I’m planning on switching form a Raspberry Pi Zero W to a 4 in order to get some usable frame rates so that’s why the board is dangling there at this point.)
Demo (Interactive)
Try adjusting the month and mode below to see the theme change.
For the above demo the geo location is set to Seattle, WA for determining sunrise and sunset times. The repo is located at GitHub: mikeiz404/wall-calendar.
Objectives
Beyond just showing the date and time the goal was to convey a sense of progress across the longer time intervals of weeks, months, and quarters. I personally find that traditional phone calendars and clocks just don’t capture this sense of progress. And that kind of makes sense given the need to optimize for screen space. Plus in the case of calendars there is often the additonal requirement to handle adding and editing events.
Visual Indicators
So let’s briefly take a look at how progress is conveyed.
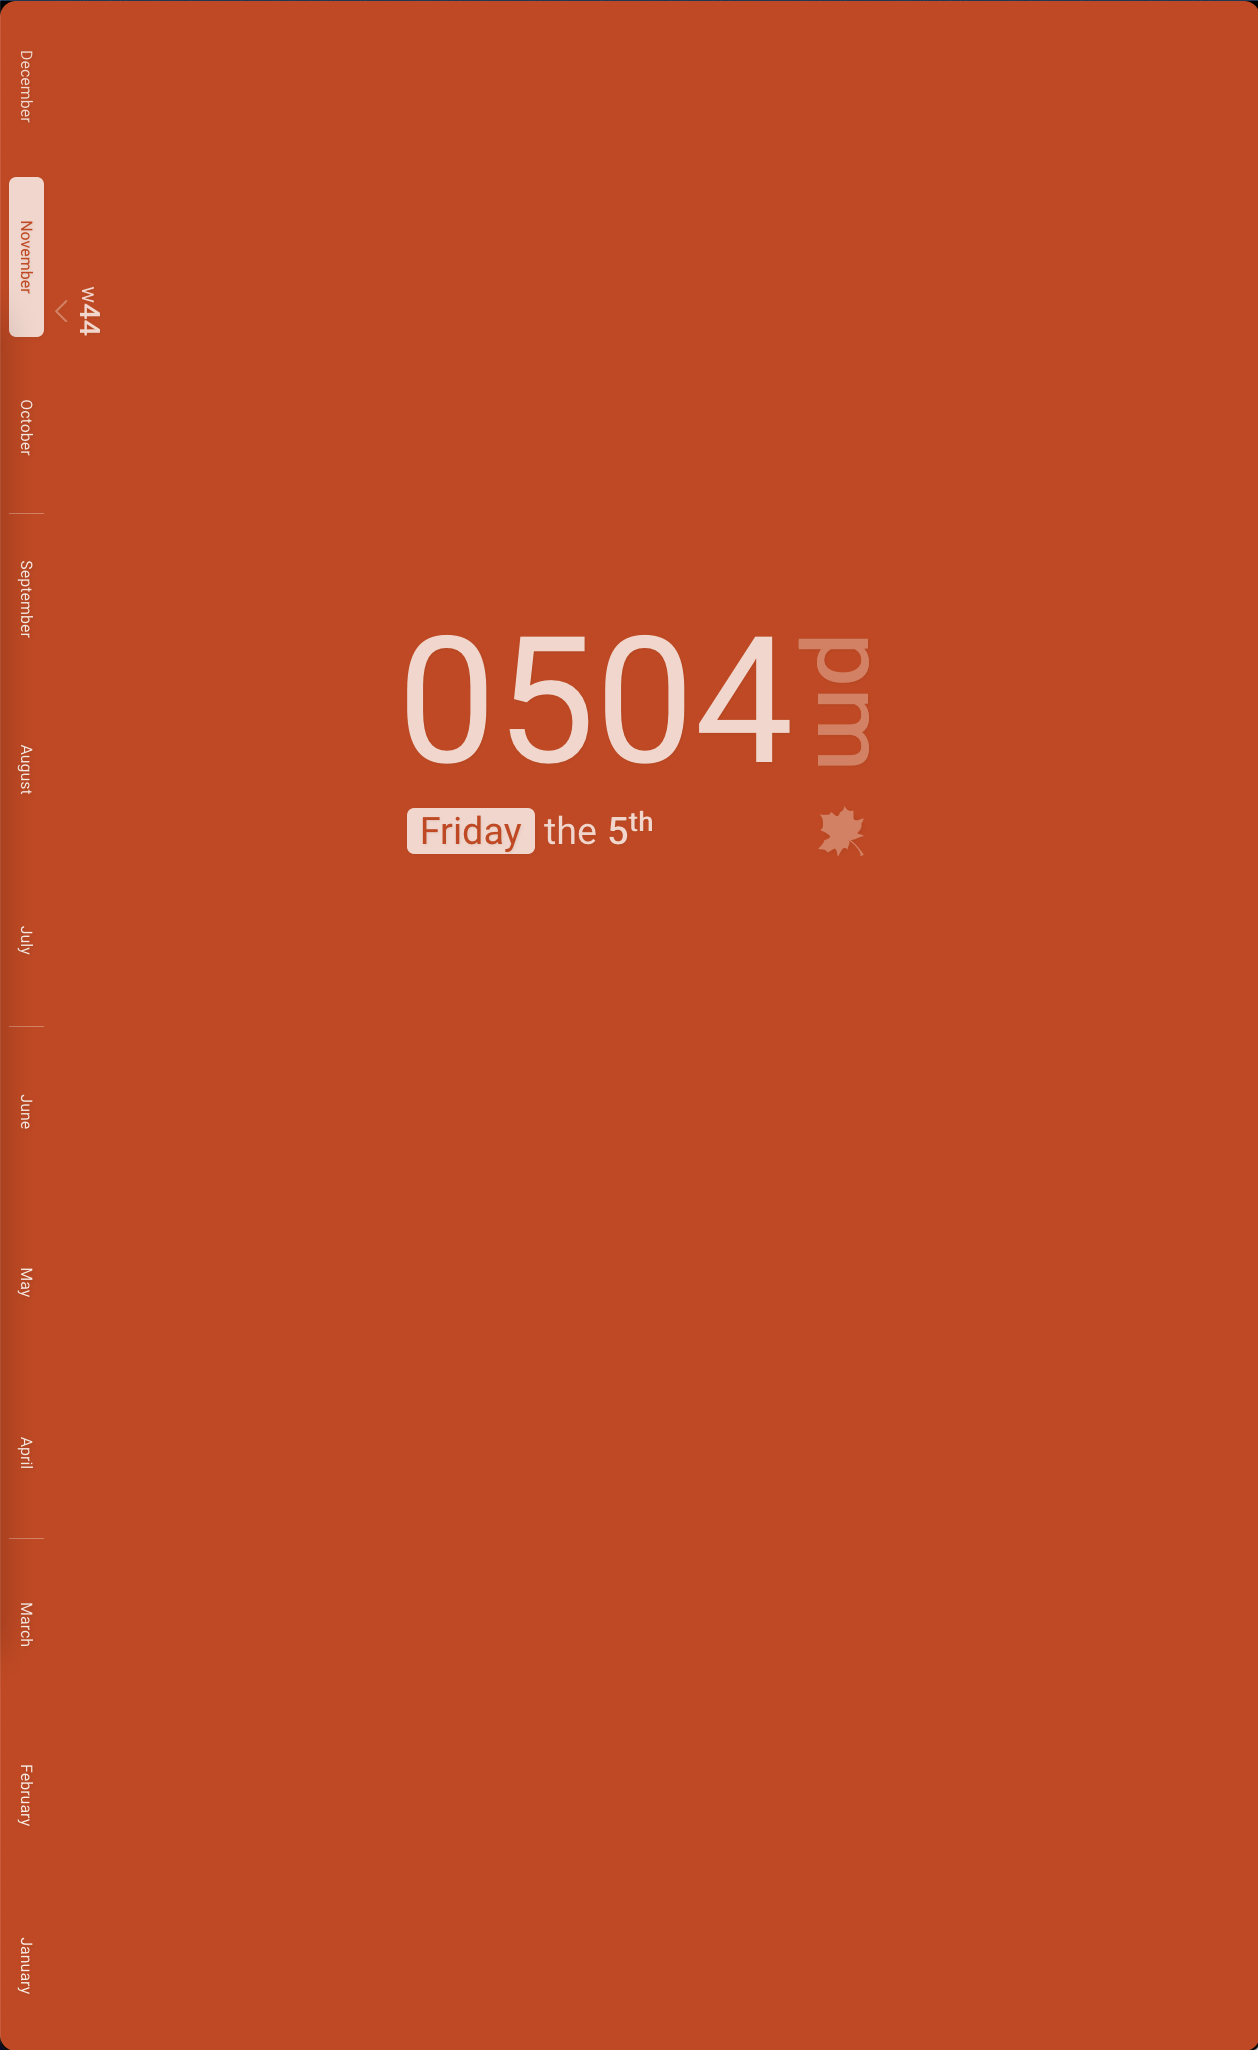
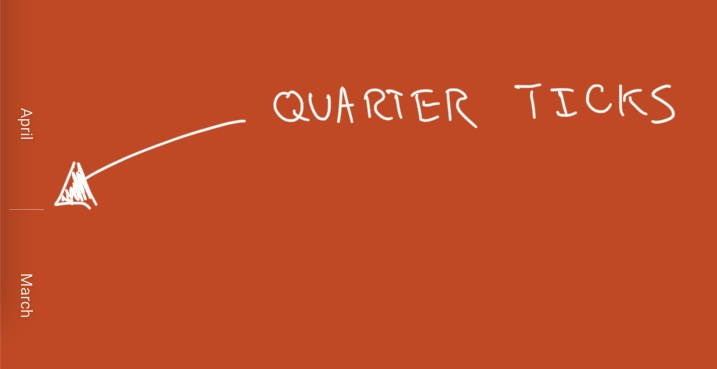
Year, Quarter, and Month
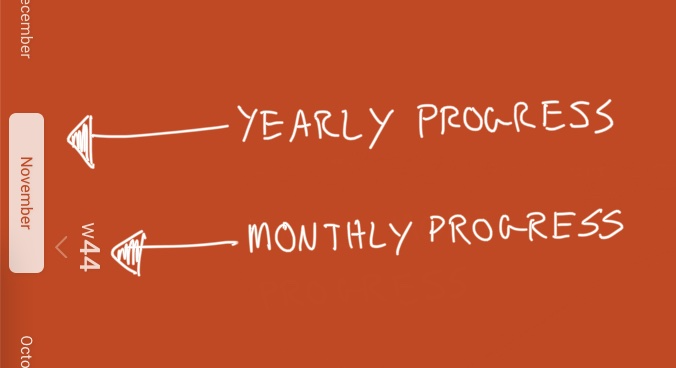
Largely the indication of progress through the year, quarters, and months takes the form of a bar running along the left side on the screen. This progress bar is composed of the months in the year stacked vertically in ascending order.
Each quarter is seperated by a corresponding tick.
Year progress is conveyed by highlighting the current month which visually moves upwards as the year progresses.
Month progress, and indirectly a more precise year progress, is indicated via a sideways chevron running along the side of the current month.
In additon the current week of the year is listed next to the marker.
As you can see nothing too radical is done in the interest of keeping things intuitive and understandable at a glance.
Season
The indication of the current season is more ambient.
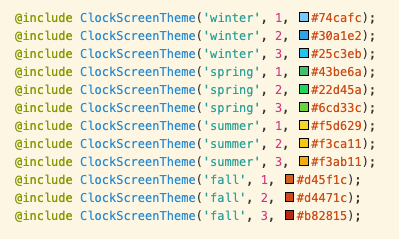
There is an icon in the center lower right of the screen representing the current season. For Fall the icon is a leaf, for Winter it is a snow flake, for Spring a flower, and for Summer a sun.
![]()
As the season progresses the theme of the calendar cycles through a series of closely related colors. And as the seasons change the color change in the theme is more significant. For Fall a series of reds are used, for Winter a series of blues, for Spring greens are used, and for Summer yellows.
Day, Evening, and Night
During the day the season’s color dictates the theme’s color.
But once the sun sets the theme transitions to a set of gray scale colors.
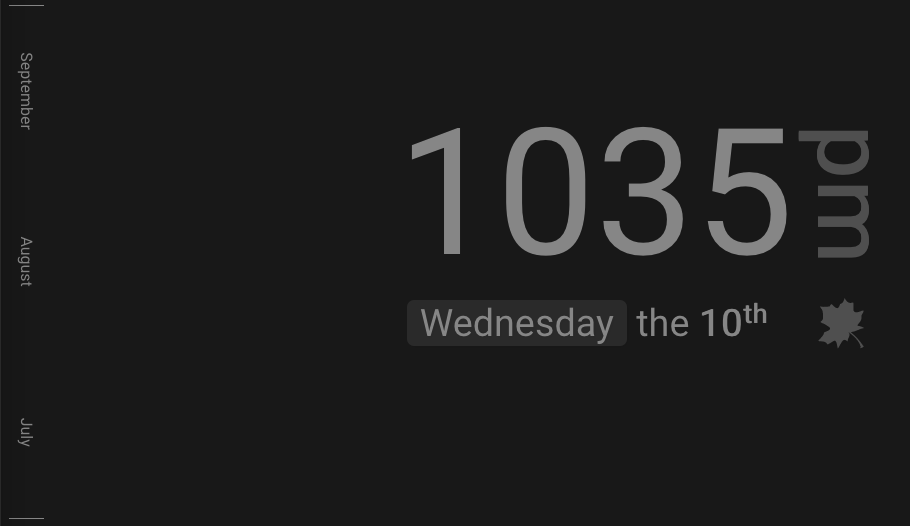
And once night occurs the theme’s gray scale colors become even more muted.

Homekit Integration
What piece of electronics, no matter how unecessary, would be complete without home automation integration?
Through the magic of HAP-python the monitor power is exposed as a HomeKit device which runs the vcgencmd to turn the monitor HDMI signal on and off.
Future Work
So what’s left? Well you might have noticed a rather large blank spot in the center of the calendar and below the time. This will be used to list upcoming events from a calendar URL.
The HomeKit service requires manual terminal work to both pair the device and reset the pairing so it can be paired again. Ideally these functions will be exposed via a webpage along with the ability to set configuration information such as geo location for determining sunset and sunrise times and when night starts.
A more stretch goal is to be able to configure the wifi settings remotely when a wifi connection cannot or has not been established. This would be accomplished by accessing a configuration page over a self hosted hotspot but this will likely require a nontrivial amount of work. However the RaspberryPi wifi chip supports both connecting to and hosting a hotspot simultaneously so this seems likely doable without a wifi dongle and definately doable with one.